Tool Build: Lathe Skew Chisel
Making a Skew Chisel
When I originally bought my lathe, I thought I got a great deal. Well, I did, but then realized I needed special chisels for it that were not cheap. Not enamored with the idea of dropping $100 per chisel, I bought 36″ of tool steel and made my own for a lot less. One of those tools I originally made was the iconic skew chisel. My first one was basic and I wanted to take it up a notch and make a new one.
Overview
At first glance, this may seem like a daunting project. But once you break it down, it’s just a bunch of simple steps. Sure, in this I have more equipment than most, but when I first made them I had basic tools and a coffee can forge that I made for $10. You CAN do this with simple tools, it just might take longer.
The Steel
For the business end of the skew, I ordered ‘O1’ Tool Steel from the internet that was 1/4″ x 1″ x 36″ long. At first glance, it’s a little expensive, but you can easily get 3-4 tools out of it depending on how long you want them. I chose ‘O1’ because it is very easy to heat treat and forgiving if you aren’t perfect with the heat treating.

I found out how to do this originally by watching a YouTube video series done by Walter Sorrells on making these kinds of tools.
Heat Treating
Without heat treating, the skew would dull pretty darn quick.
Disclaimer: I am not an expert. This is based on information I have been told, and learned through too much YouTube and some personal experience. I am just a dude with some tools having fun.
To heat treat the steel, I got my forge up to 1,500 degrees Fahrenheit and let the steel ‘soak’ in it for a few minutes. You don’t need a fancy high-temp thermometer to accomplish this. You can use a magnet on a stick. To see when the steel hits ‘critical temp’, put the magnet against it. If the magnet doesn’t grab it, you have achieved critical temperature for quenching. Be careful not to get it too hot though, it will weaken the steel.


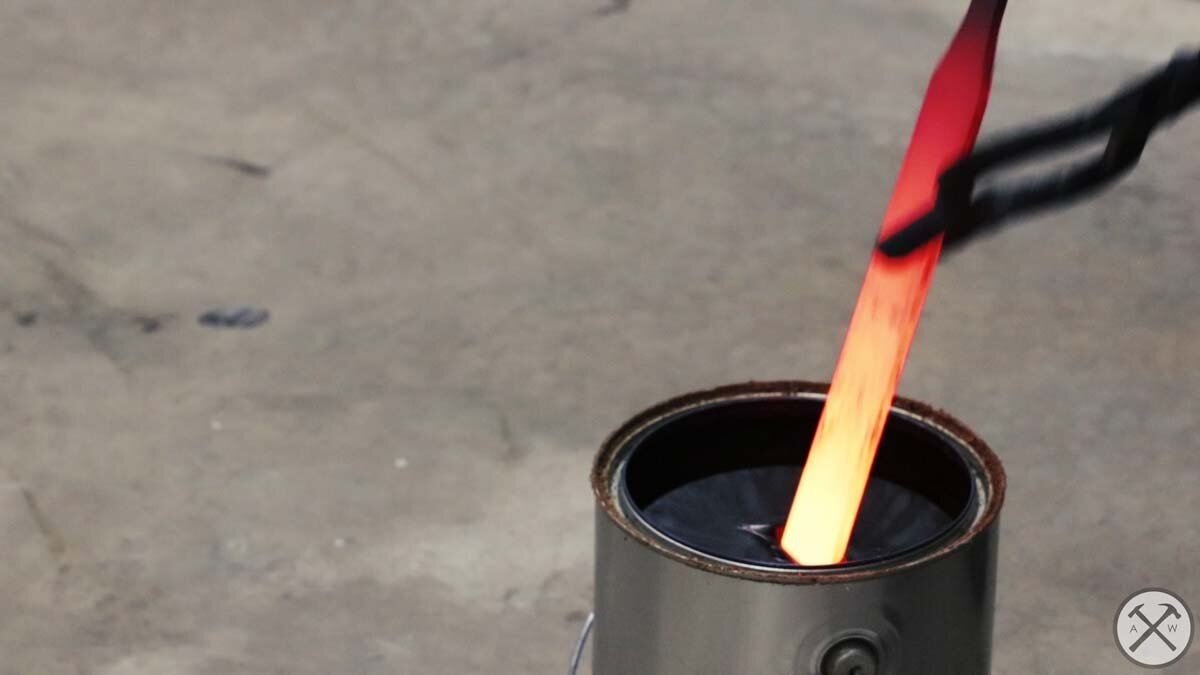
To quench, I used a gallon of canola oil from the grocery store in a steel bucket. I prefer canola oil instead of motor oil so my garage smells like french fries and not impending cancer. Quench the working end of the steel but let the tang end cool off normally. This will allow the back end to be tough and impact resistant while having a sharp edge.
To verify you have successfully hardened the steel, run a file over it. If the file glides across without easily catching, it’s hardened. If it catches though, it’s not hardened and it’s time to try again (this is where O1 is forgiving). Once it is hardened it is very rigid and even fragile at this point. Drop it wrong and it will break. This is where tempering comes into play.
To temper the steel after successfully hardening it, we need to heat it up again. Only this time, a lower temperature for longer. I did 400 degrees Fahrenheit for one hour in our kitchen oven. This relieves a lot of the internal stresses in the steel caused by quenching.
ASK your wife before using her oven to temper steel! I am not responsible if you get in trouble with your wife!
The Handle
The hardest part of the handle is making sure to drill a hole for the tang of the steel so it is well centered. This isn’t a deal breaker if you can’t get it down the center of the axis of the handle, but if you can you will be left with a higher quality tool in the end.
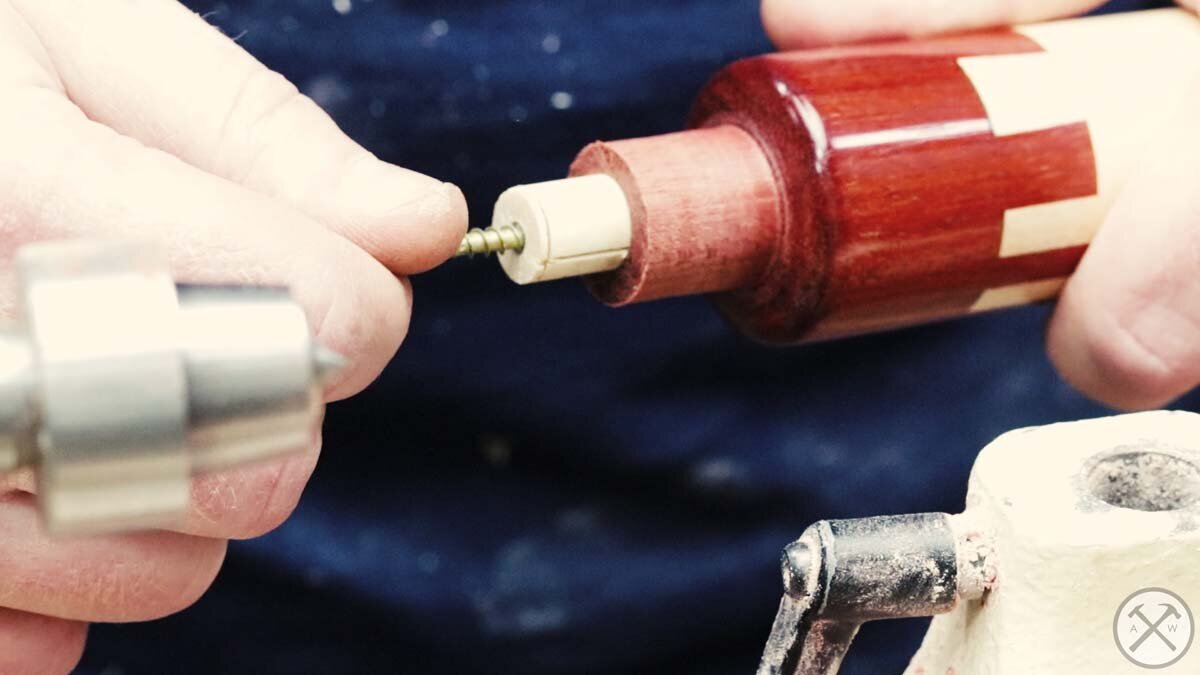
I drilled a 1/2″ hole about 3″ deep for the tang. To make it easier to mount for turning, I inserted a small piece of dowel that was pre-drilled in the center. When I was done I could remove it with a screw.
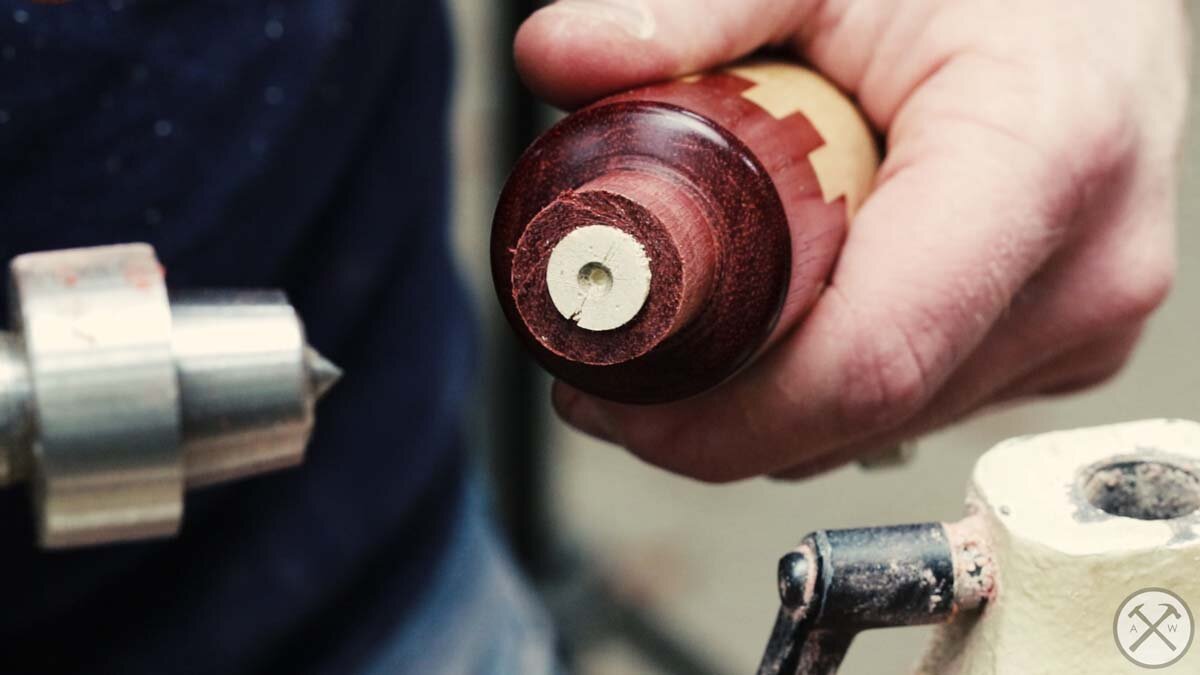
You can do a simple handle out of simple maple if you wanted. In this case, I chose maple with bloodwood.
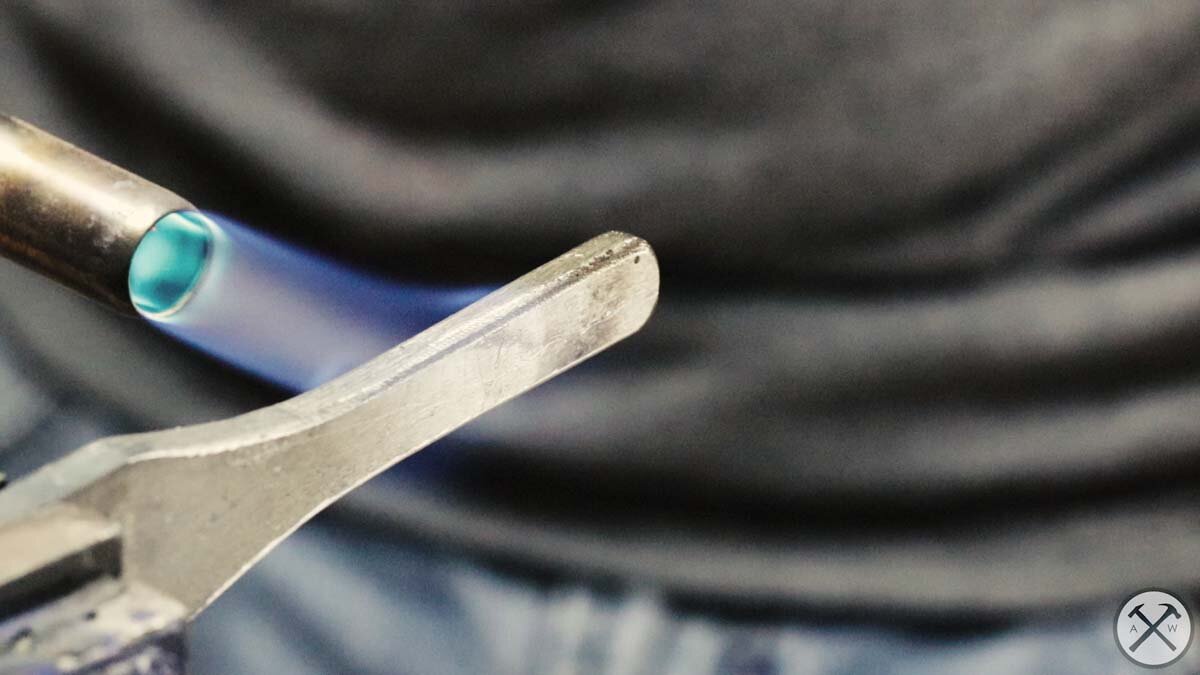
Once it was turned, I removed the temporary plug I put in for alignment on the lathe and pulled out my torch. I set the torch to LOW and began heating the tang until it turned a straw color (if its turning blue you’re getting too hot). The hot tang allows it to burn into the handle creating a snug fit. I went through two or three heats before it got fully seated.

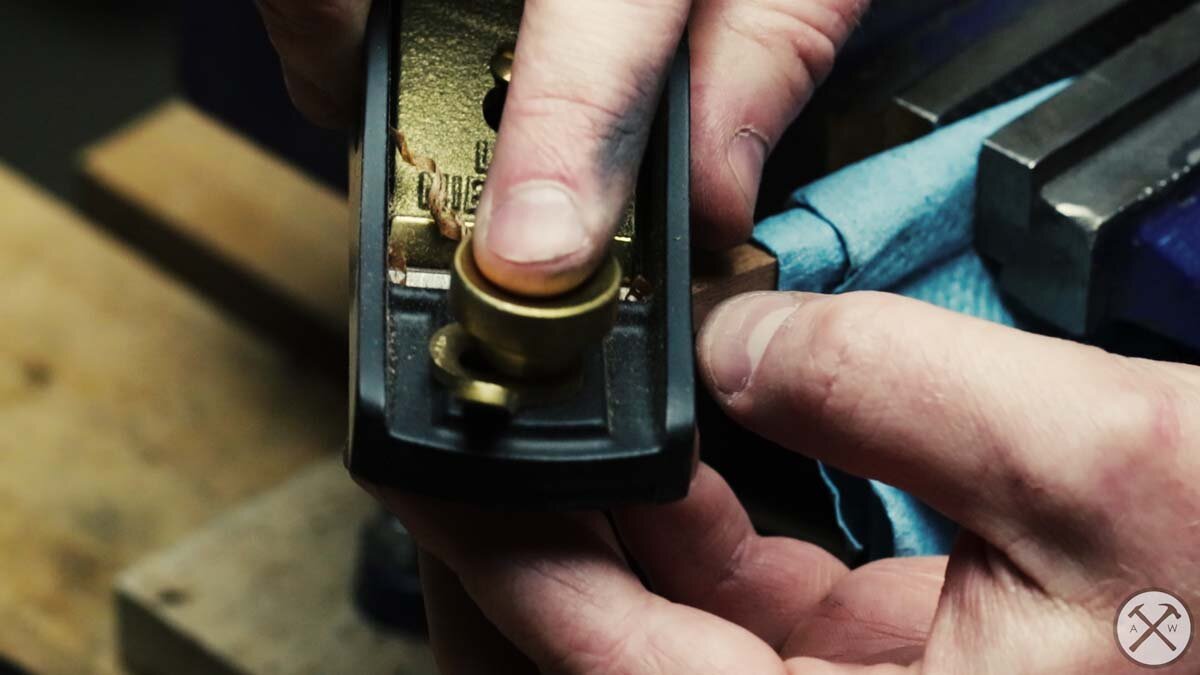
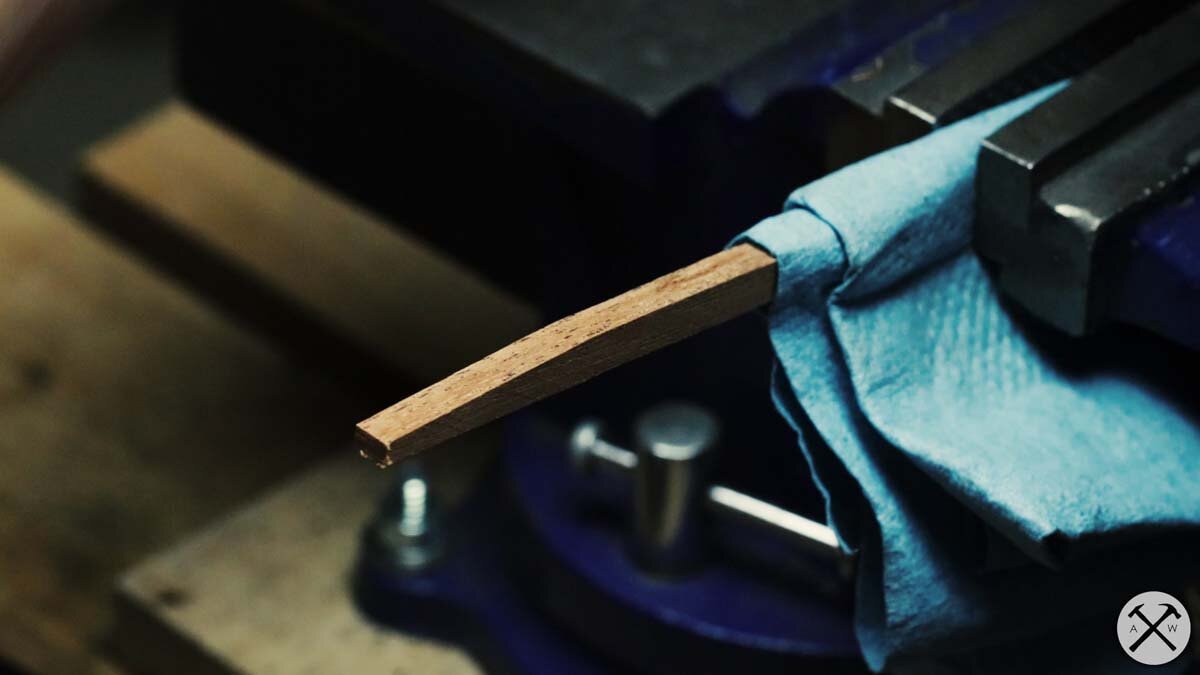
Using some scrap mahogany, I made little wedges to hold the steel securely in the handle for the grinding step. I did not epoxy it in until the very end. This allowed me the option to pull out the steel and re-heat treat if I needed to, in case it didn’t fully harden.
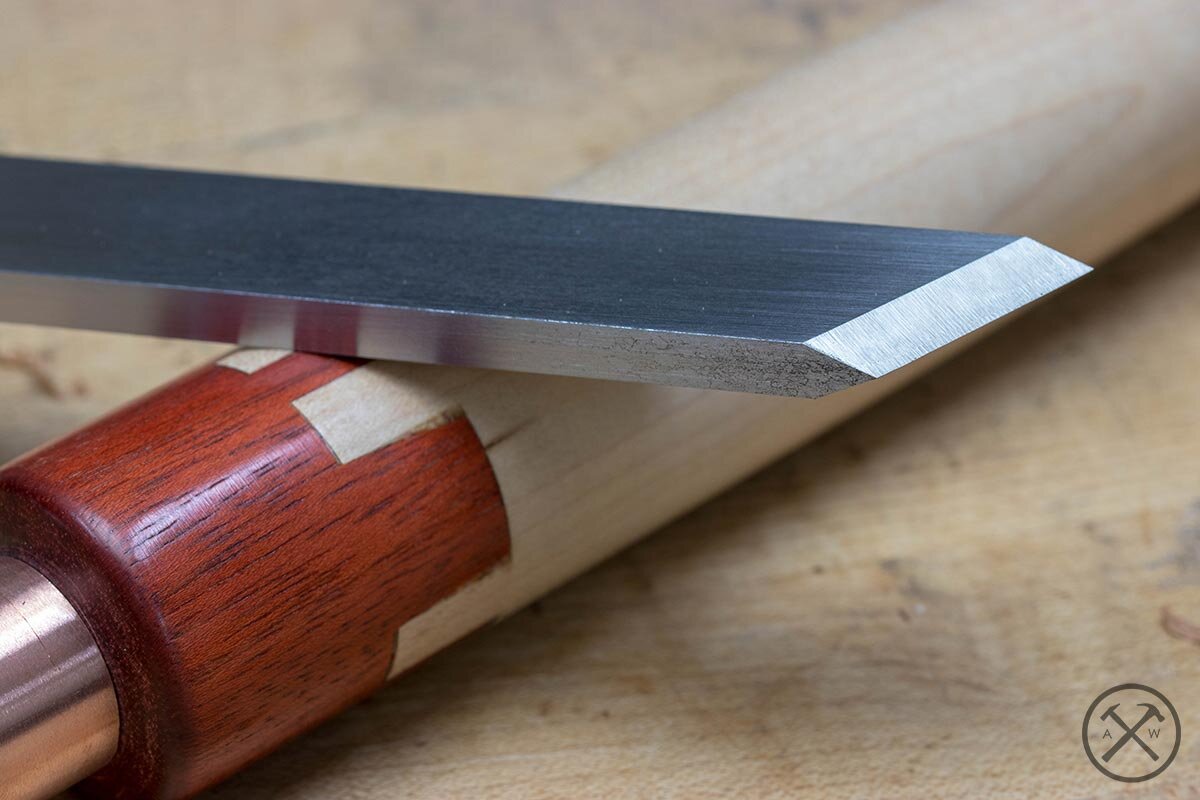
Putting the Edge On
To sharpen the skew, I used a slow speed grinder I found at an estate sale. Since I had the slow speed grinder I did not put any bevels on the steel before heat treat. The idea is that with the stock being all the same thickness, I could be less concerned about overheating the thin edge, weakening the steel.

Note – if you don’t have a slow speed grinder, I highly recommend grinding your bevels BEFORE heat treat. With the caveat that you only go most of the way and leave some material on the edge to prevent that overheating. Otherwise, you will spend more than a few hours with sandpaper and/or ruin some files trying to put full bevels on hardened steel.
The slow-speed grinder allowed me to put consistent bevels on the edge as well as not over-heating the steel as I worked. The steel should never get too hot to touch after heat treating. If the hardened end turns blue, the heat treatment in that spot is ruined and it will be soft. Keep a bucket of water handy and when it gets warm, just give it a quick dip.
Final Assembly
With the final edge on and knowing the skew edge is made of hardened steel it’s time for final assembly. First I covered the entire wooden handle with blue painters tape to prevent any errant epoxy ruining the finish.
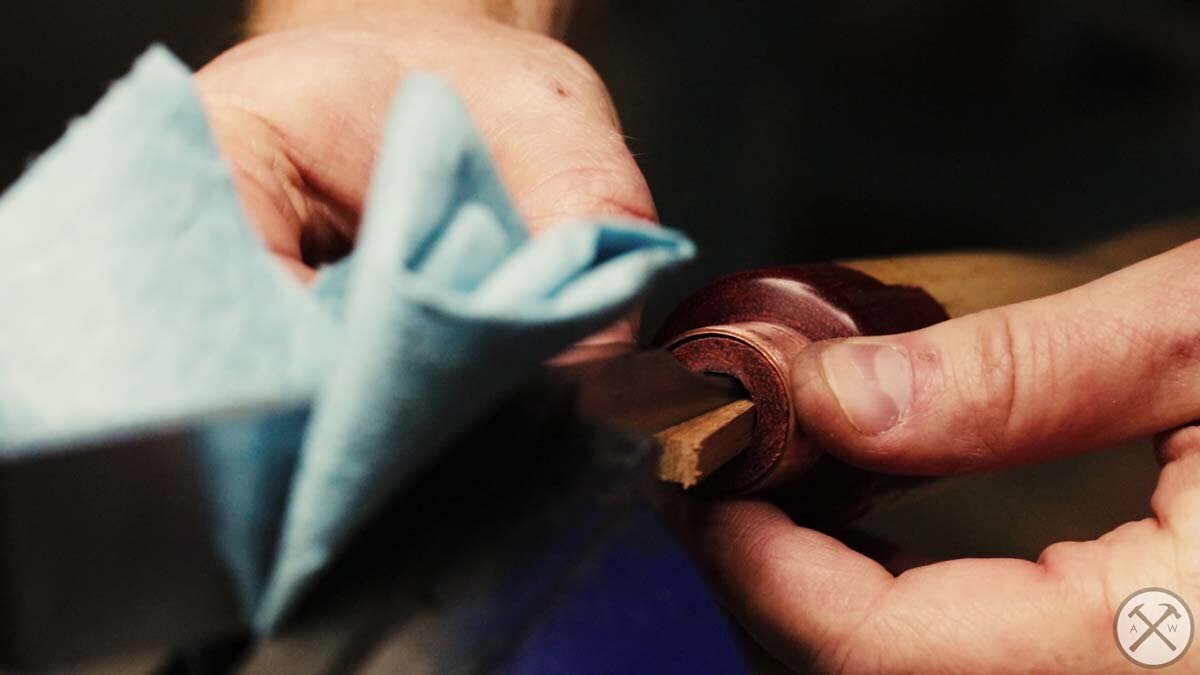
Using the small wooden wedges, I was able to adjust them until the steel looked to be in line with the handle and not cockeyed. Satisfied, I grabbed my gloves and epoxy and started mixing. I had only 5 min epoxy so I had to work fast.
I pulled out the steel and put some epoxy in the hole in the handle and around the tang and pushed it back in. Quickly followed by the wooden wedges pushing them back to where I had them to make it all plumb. I then lifted the ferrule up and epoxied around the wood that it covered and put it back in place. Lastly, I grabbed a cheap saw to flush cut the wedges at the top so they didn’t poke out. I then covered that area with epoxy and filled any gaps in the hole around the steel.
Using Acetone, I was able to clean up any epoxy that got on anything where it didn’t belong. This was handy as I had inadvertently got some higher up on the steel during my frantic glue up. The acetone effortlessly got it off (it was not cured yet, which is key) leaving a nice finish.


Build Video
Materials
Maple turning stock
Copper pipe (used as a ferrule)
Tools I Used
Nova G3 Chuck (Don’t forget to get the correct adapter for your lathe)
Drill bits
High Temp Thermometer (don’t forget to get a probe!)