Tool Build: Roughing Gouge

Building a Roughing Gouge for the Lathe
Seeing as I only turn something on the lathe once and a while, it was hard to justify dropping a ton of money on lathe tools but I also didn’t want to sacrifice a ton in quality. In this post, I will go through what I did to build my roughing gouge. I would consider it a companion to the video of the build posted on YouTube.
Starting Point:
I had some maple scrap left over from building butcher blocks so I used that for the handle. I began by cutting it to length so it would fit on my small lathe.

Cutting the blank for the gouge.
I then drilled the half-inch hole for mounting the business end of the tool while the wood was still square. This makes drilling the hole much easier (trust me, I learned this the hard way).

Drilling the hole to mount the steel later.
Turning:
Once the blank was all prepped, I mounted it to the lathe and got to work. I used my other shop made tools to turn it, though you may wonder, how did I even start if they are all shop made? for the first ones, I used a cheap set from Amazon to get me started. The shape of the handle is up to you, and whatever you find is more comfortable.
The shape of the handle is up to you, and whatever you find is more comfortable. Just make sure to carefully turn the business end down so a copper pipe fitting can just slide over it to act as a ferrule which helps strengthen the tool. I scored lines in the mounting area for the ferrule to give the epoxy more surface area to hold on to.

I then applied a quick finish of Arm-R-Seal to it to seal the handle. You can use tung oil or whatever finish you want.
Light Metal Work
I took a piece of 1/2″ steel rod that I got at the local big box store and insert it into the hole in the handle and measure out about 7.5″ from the end of the handle and marked that as my cutting point. The 7.5″ isn’t a set rule, it’s just a length I am comfortable with on my other ones. I then cut it to length with the angle grinder but a cheap hack saw can do the trick.

I then headed over to my belt sander (a file can do this work as well) and rounded the end.
Taking a spare piece of carbide for the head of my jointer (also cheap on Amazon) I mark the end of the steel rod and flatten the area to make a bed of sorts for the carbide using a file.

Once flattened, I mark a spot to drill the screw hole and drill starting with a small bit to make a pilot hole and then drill with the proper size bit for the screw so I can tap it. I had spare screws that matched the carbide. You can also snag these from the local big box store. Just take in the carbide and make sure the head seats firmly in the carbide, you want to make sure it is snug!
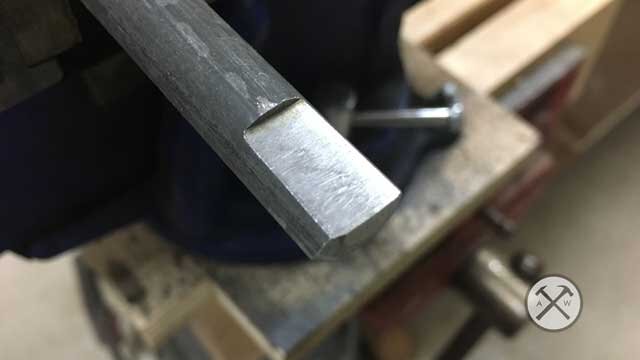


I also use the file to score the glue end of the rod to help the epoxy keep a good hold of it.

OPTIONAL: I chucked the metal piece in the lathe and sanded it so it wasn’t the dull gray/black color and gave it a nice brushed metal look.

Finishing Up
With the parts done, it’s time for glue up. I used a 5-min Epoxy to hold it all together. Try to be careful in the application to keep it from unnecessarily getting all over. I let it cure overnight just to be safe and then took it for a spin and the roughing gouge worked great!

Using epoxy to glue the steel in the handle and secure the ferrule.
Resources
Cheap Lathe Tool Set: http://amzn.to/2pZgRod
Square Carbide: http://amzn.to/2pLo0c9
Round Carbide: http://amzn.to/2pLzufN
Gorilla Epoxy: http://amzn.to/2pZkQ47